Set Up an Ansible Practice Lab with Docker in Under 10 Minutes
Learn how to build a local, multi-host Ansible practice lab using Docker in under 10 minutes. Perfect for Windows, macOS, or Linux. No heavy VMs required.

When you first set out to learn Ansible, the learning itself usually is not the hardest part. The real challenge is everything leading up to it: spinning up virtual machines, installing Linux distributions, configuring networking, setting up SSH access, and keeping everything healthy. For many, precious practice time is wasted on system administration rather than actually learning Ansible automation.
A single VM is not a great workaround, either. Using just one machine defeats the core purpose of Ansible: automating tasks across a group of machines simultaneously.
To solve this, I built the Ansible practice lab that this series relies on. This lab takes you from a simple git clone to having four fully functional Linux servers ready to receive Ansible commands in under ten minutes. It works seamlessly on Windows, macOS, Linux, or even directly in your web browser with zero local installation.
The best part? Everything is completely disposable. If a container breaks or a playbook corrupts a host, you can rebuild the entire environment in seconds without losing any progress. We have handled the admin work so you can focus 100% of your time on mastering Ansible.
Note: You need to be comfortable running basic commands in a terminal. You do not need prior Ansible experience, a cloud provider account, or expensive spare hardware.
What is Ansible?
If you are completely new to the tool, Ansible is an open-source IT automation engine. It automates cloud provisioning, configuration management, application deployment, and orchestration.
Two features make it incredibly popular:
- It is agentless: You do not need to install special software agents on the servers you want to manage. Ansible connects via standard SSH and pushes changes directly.
- It uses simple YAML: Ansible playbooks (the files where you write your automation instructions) are written in YAML, which approaches plain English. You do not need to be a software engineer to read or write them.
Instead of logging into five different servers to update a package or create a user, you define the desired state in an Ansible playbook, and Ansible makes it happen across all five servers simultaneously.
The Zero-Install Route: GitHub Codespaces
Before we look at the local setup, it is worth highlighting the fastest way to start. If you want to bypass local installation entirely, you can run this entire four-node Linux lab directly in your web browser using GitHub Codespaces.
This is incredibly useful if you are on a restricted machine or simply want to jump straight into Ansible without configuring Docker locally.
To start immediately:
- Open the lab in GitHub Codespaces.
- Wait a moment for the environment to build.
- Run the lab setup commands right in the browser terminal.
The development container comes with its own Docker engine built in. GitHub provides a generous free tier that is more than enough for this series. Just remember to stop your Codespace when you are done to save your allowance.
The 10-Minute Local Quickstart
If you prefer to run things locally and already have Git and Docker installed on your system, you can launch the lab right now:
git clone https://github.com/Ali-Shaikh/ansible-practical-lab.git
cd ansible-practical-lab
./lab doctor   # Run a pre-flight check
./lab up       # Build and start the Ansible lab
./lab ping     # Execute your first Ansible command
Using Windows without WSL? Use our PowerShell wrapper instead:
Run .\lab.ps1 doctor, .\lab.ps1 up, and .\lab.ps1 ping.
When ./lab ping returns four successful pong responses, your Ansible environment is fully operational. You can skip ahead to Run Your First Ansible Command to learn what just happened. If you need help with installation or want to understand the architecture, keep reading.
What is Inside the Ansible Lab?
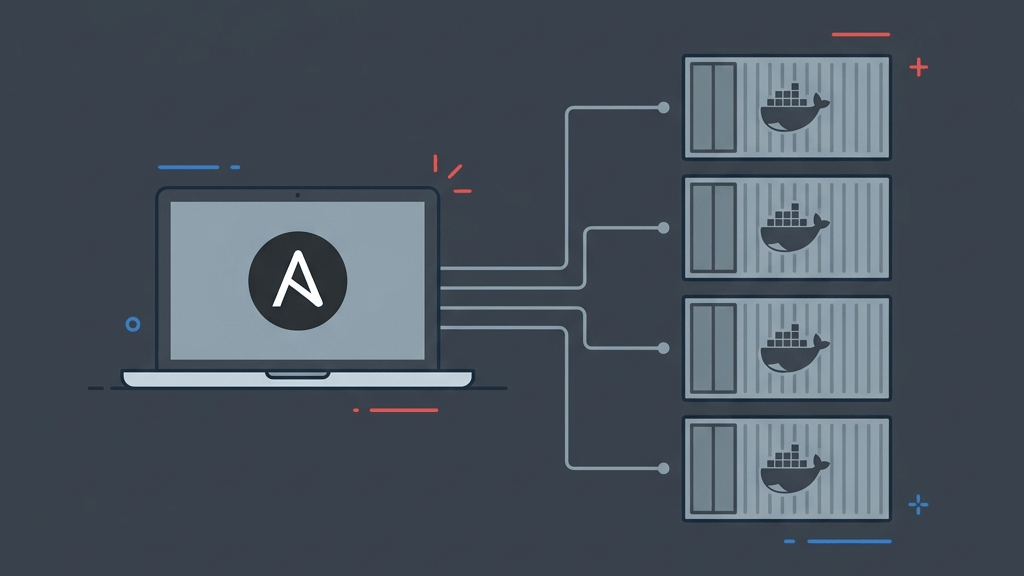
This practice lab provisions a tiny, self-contained estate of Linux servers built entirely from lightweight Docker containers:
Your Laptop (Control Node)
  |
  | Runs Ansible from your local shell or a 'forge' container
  |
  +-- atlas     (General-purpose Linux host)
  +-- beacon    (Web server host)
  +-- ledger    (Database-style host)
  +-- vaultbox  (Secrets and certificate practice host)
Each managed host is named based on its intended role. This makes your playbooks and commands much easier to read than generic names like node1 or node2. Throughout this series, we will put each host to work. For instance, beacon will serve web traffic, and vaultbox will manage encrypted secrets.
How Ansible Interacts with the Lab
Ansible operates using a Control Node and Managed Nodes. This lab provides both:
- The Control Node: The machine where you run your Ansible commands. This can be your local shell or the lab's included
forgecontainer (which spins up automatically when needed). - The Managed Nodes: The target machines Ansible connects to and configures. In the real world, these are VMs, cloud instances, or bare-metal servers. In our lab, these are the four Docker containers listed above, all running Linux and an SSH daemon.
A quick note on realism: While production Docker containers rarely run SSH, our lab containers do. We do this because Ansible natively manages Linux machines via SSH. This setup replicates a real-world server environment perfectly, but with the speed and zero-cost benefits of disposable containers.
Install the Prerequisites
If the quickstart or Codespaces route worked for you, skip this section! Otherwise, follow the instructions for your specific operating system to get Git, Docker, and a terminal set up.
Note: Installing Ansible locally is optional on macOS and Linux (our forge container can run it for you). If you do install it locally, the official recommended method is pipx install --include-deps ansible. Ansible does not natively support Windows as a control node.
Windows With WSL (Recommended)
This is the most robust way to run Ansible on Windows.
- Install Docker Desktop for Windows.
- Install WSL (Windows Subsystem for Linux) with an Ubuntu distribution.
- Install Git inside your WSL environment.
Run all lab commands from your WSL bash shell, not from cmd.exe. Verify your tools first:
git --version
docker version
docker compose version
Windows Without WSL
If you prefer not to use WSL, you can run the lab using PowerShell:
- Install Docker Desktop for Windows.
- Install Git for Windows.
- Ensure you have PowerShell 7 or newer.
Use the provided PowerShell wrapper script for all commands. Your Windows machine only needs Docker; Ansible will run inside the forge container.
git clone https://github.com/Ali-Shaikh/ansible-practical-lab.git
cd ansible-practical-lab
.\lab.ps1 doctor
.\lab.ps1 up
.\lab.ps1 ping
macOS
Install Docker Desktop for Mac and Git. To run Ansible locally rather than in the container, use Homebrew:
brew install git pipx
pipx ensurepath
pipx install --include-deps ansible
Open a new terminal session and verify your installation:
git --version
docker version
docker compose version
ansible --version
Linux
Install Docker using the official repository instructions for your specific distribution (avoid outdated blog posts, as Docker packaging frequently changes). Then run:
sudo apt update
sudo apt install -y git python3 python3-pip pipx
pipx ensurepath
pipx install --include-deps ansible
Open a new terminal and verify the tools. (If docker version returns a permission error, ensure your user is added to the docker group as per the official post-install guidance).
Start the Lab Environment
With prerequisites installed, clone the repository and run the pre-flight check:
git clone https://github.com/Ali-Shaikh/ansible-practical-lab.git
cd ansible-practical-lab
./lab doctor
The doctor command validates everything that typically trips up beginners: Git, Docker, Compose, ssh-keygen, and ensuring the necessary local ports (2222 to 2225 for SSH, 8080 for HTTP) are free.
Next, build and start the lab:
./lab up
The initial run takes a few minutes as Docker downloads base images. During this process, the lab automatically generates an Ed25519 SSH key pair (stored in .lab/ssh), injects the public key into the managed hosts, and configures Ansible to use the private key. Your personal SSH keys are untouched.
Verify everything is running:
./lab status
You should see your four managed hosts online.
(Optional: Run ./lab studio to open a web-based VS Code editor at http://127.0.0.1:8443 with all tools pre-configured.)
Run Your First Ansible Command
It is time to test your setup with the Ansible ping module:
./lab ping
(On Windows without WSL, use .\lab.ps1 ping)
You should see output similar to this:
atlas | SUCCESS => {
    "changed": false,
    "ping": "pong"
}
beacon | SUCCESS => {
    "changed": false,
    "ping": "pong"
}
ledger | SUCCESS => {
    "changed": false,
    "ping": "pong"
}
vaultbox | SUCCESS => {
    "changed": false,
    "ping": "pong"
}
Seeing four pong responses is a massive milestone! It proves that:
- Ansible successfully read your inventory.
- It reached every managed node.
- It authenticated securely over SSH.
- It executed a Python module on each host.
- It returned structured JSON results.
Note: The Ansiblepingmodule is completely different from the standard ICMP networkpingcommand. It is a dedicated test module that proves Ansible can connect, authenticate, and execute code successfully.
What Just Happened? The Ansible Mental Model
The flow of that simple ping command represents the core workflow of Ansible:
- Inventory: Ansible reads the inventory file to discover available hosts.
- Connection: Ansible connects to the targeted hosts via SSH.
- Distribution: Ansible securely copies a small Python module to the remote host.
- Execution: The remote host executes that module.
- Collection: Ansible retrieves the results and displays them in your terminal.
Almost all advanced Ansible tasks are just variations of this loop. Instead of simply testing the connection, you will eventually instruct Ansible to install packages, manage users, render configuration files, and restart services.
Troubleshooting Common Setup Problems
Docker Is Not Running
Error: Cannot connect to the Docker daemon
Fix: Launch Docker Desktop (Windows/macOS) or start the Docker system service (Linux). Run docker version to ensure both client and server are active.
Docker Compose Is Missing
Error: docker: 'compose' is not a docker command
Fix: Install Docker Desktop, or manually install the docker-compose-plugin for Linux.
Ansible Is Missing
Error: ansible: command not found
Fix: On Linux/macOS, run pipx install --include-deps ansible. On Windows without WSL, ensure you are using the .\lab.ps1 wrapper script to utilise the built-in forge container.
SSH Connection Fails
Error: UNREACHABLE!
Fix: Verify the lab is running with ./lab status. If containers were interrupted or rebuilt, reset the lab entirely:
./lab reset
./lab up
./lab ping
How to Clean Up
When you are done with your practice session, simply spin down the containers:
./lab down
If you ever want to completely wipe the lab and start from scratch, run:
./lab reset
Do not hesitate to use the reset command! The entire purpose of this lab is to make experimenting and making mistakes completely painless.
What You Learnt
Congratulations! You now have a robust, multi-host Ansible practice environment running. You have also executed your first Ansible command and witnessed the core control-node to managed-node workflow in action.
In the next article, we will dive deeper into the Ansible inventory. We will inspect host groups, run powerful ad-hoc commands, gather system facts, and start using Ansible to solve real-world operational challenges.
Keep Reading
If you enjoyed building this local lab, you might also like my guides on running full cloud environments on your local machine:
- Run AWS on Your Laptop: A 9-Part LocalStack Build Series
- Deploying Azure locally with OpenTofu and floci-az
You can find more DevOps and automation articles on the homepage at alishaikh.me.
Official Documentation
If you want to dig deeper into the tools we used today, these official guides are the best places to start:
- Ansible: Installation Guide and Getting Started.
- Core Concepts: Learn more about the Inventory and Ad-Hoc Commands.
- Modules: The builtin ping module we just used.
- Docker: Ensure your Docker Desktop installation is fully up to date.Set Up an Ansible Practice Lab with Docker in Under 10 Minutes
When you first set out to learn Ansible, the learning itself usually is not the hardest part. The real challenge is everything leading up to it: spinning up virtual machines, installing Linux distributions, configuring networking, setting up SSH access, and keeping everything healthy. For many, precious practice time is wasted on system administration rather than actually learning Ansible automation.
A single VM is not a great workaround, either. Using just one machine defeats the core purpose of Ansible: automating tasks across a group of machines simultaneously.
To solve this, I built the Ansible practice lab that this series relies on. This lab takes you from a simple git clone to having four fully functional Linux servers ready to receive Ansible commands in under ten minutes. It works seamlessly on Windows, macOS, Linux, or even directly in your web browser with zero local installation.
The best part? Everything is completely disposable. If a container breaks or a playbook corrupts a host, you can rebuild the entire environment in seconds without losing any progress. We have handled the admin work so you can focus 100% of your time on mastering Ansible.
Note: You need to be comfortable running basic commands in a terminal. You do not need prior Ansible experience, a cloud provider account, or expensive spare hardware.
What is Ansible?
If you are completely new to the tool, Ansible is an open-source IT automation engine. It automates cloud provisioning, configuration management, application deployment, and orchestration.
Two features make it incredibly popular:
- It is agentless: You do not need to install special software agents on the servers you want to manage. Ansible connects via standard SSH and pushes changes directly.
- It uses simple YAML: Ansible playbooks (the files where you write your automation instructions) are written in YAML, which approaches plain English. You do not need to be a software engineer to read or write them.
Instead of logging into five different servers to update a package or create a user, you define the desired state in an Ansible playbook, and Ansible makes it happen across all five servers simultaneously.
The Zero-Install Route: GitHub Codespaces
Before we look at the local setup, it is worth highlighting the fastest way to start. If you want to bypass local installation entirely, you can run this entire four-node Linux lab directly in your web browser using GitHub Codespaces.
This is incredibly useful if you are on a restricted machine or simply want to jump straight into Ansible without configuring Docker locally.
To start immediately:
- Open the lab in GitHub Codespaces.
- Wait a moment for the environment to build.
- Run the lab setup commands right in the browser terminal.
The development container comes with its own Docker engine built in. GitHub provides a generous free tier that is more than enough for this series. Just remember to stop your Codespace when you are done to save your allowance.
The 10-Minute Local Quickstart
If you prefer to run things locally and already have Git and Docker installed on your system, you can launch the lab right now:
git clone https://github.com/Ali-Shaikh/ansible-practical-lab.git
cd ansible-practical-lab
./lab doctor   # Run a pre-flight check
./lab up       # Build and start the Ansible lab
./lab ping     # Execute your first Ansible command
Using Windows without WSL? Use our PowerShell wrapper instead:
Run .\lab.ps1 doctor, .\lab.ps1 up, and .\lab.ps1 ping.
When ./lab ping returns four successful pong responses, your Ansible environment is fully operational. You can skip ahead to Run Your First Ansible Command to learn what just happened. If you need help with installation or want to understand the architecture, keep reading.
What is Inside the Ansible Lab?
This practice lab provisions a tiny, self-contained estate of Linux servers built entirely from lightweight Docker containers:
Your Laptop (Control Node)
  |
  | Runs Ansible from your local shell or a 'forge' container
  |
  +-- atlas     (General-purpose Linux host)
  +-- beacon    (Web server host)
  +-- ledger    (Database-style host)
  +-- vaultbox  (Secrets and certificate practice host)
Each managed host is named based on its intended role. This makes your playbooks and commands much easier to read than generic names like node1 or node2. Throughout this series, we will put each host to work. For instance, beacon will serve web traffic, and vaultbox will manage encrypted secrets.
How Ansible Interacts with the Lab
Ansible operates using a Control Node and Managed Nodes. This lab provides both:
- The Control Node: The machine where you run your Ansible commands. This can be your local shell or the lab's included
forgecontainer (which spins up automatically when needed). - The Managed Nodes: The target machines Ansible connects to and configures. In the real world, these are VMs, cloud instances, or bare-metal servers. In our lab, these are the four Docker containers listed above, all running Linux and an SSH daemon.
A quick note on realism: While production Docker containers rarely run SSH, our lab containers do. We do this because Ansible natively manages Linux machines via SSH. This setup replicates a real-world server environment perfectly, but with the speed and zero-cost benefits of disposable containers.
Install the Prerequisites
If the quickstart or Codespaces route worked for you, skip this section! Otherwise, follow the instructions for your specific operating system to get Git, Docker, and a terminal set up.
Note: Installing Ansible locally is optional on macOS and Linux (our forge container can run it for you). If you do install it locally, the official recommended method is pipx install --include-deps ansible. Ansible does not natively support Windows as a control node.
Windows With WSL (Recommended)
This is the most robust way to run Ansible on Windows.
- Install Docker Desktop for Windows.
- Install WSL (Windows Subsystem for Linux) with an Ubuntu distribution.
- Install Git inside your WSL environment.
Run all lab commands from your WSL bash shell, not from cmd.exe. Verify your tools first:
git --version
docker version
docker compose version
Windows Without WSL
If you prefer not to use WSL, you can run the lab using PowerShell:
- Install Docker Desktop for Windows.
- Install Git for Windows.
- Ensure you have PowerShell 7 or newer.
Use the provided PowerShell wrapper script for all commands. Your Windows machine only needs Docker; Ansible will run inside the forge container.
git clone https://github.com/Ali-Shaikh/ansible-practical-lab.git
cd ansible-practical-lab
.\lab.ps1 doctor
.\lab.ps1 up
.\lab.ps1 ping
macOS
Install Docker Desktop for Mac and Git. To run Ansible locally rather than in the container, use Homebrew:
brew install git pipx
pipx ensurepath
pipx install --include-deps ansible
Open a new terminal session and verify your installation:
git --version
docker version
docker compose version
ansible --version
Linux
Install Docker using the official repository instructions for your specific distribution (avoid outdated blog posts, as Docker packaging frequently changes). Then run:
sudo apt update
sudo apt install -y git python3 python3-pip pipx
pipx ensurepath
pipx install --include-deps ansible
Open a new terminal and verify the tools. (If docker version returns a permission error, ensure your user is added to the docker group as per the official post-install guidance).
Start the Lab Environment
With prerequisites installed, clone the repository and run the pre-flight check:
git clone https://github.com/Ali-Shaikh/ansible-practical-lab.git
cd ansible-practical-lab
./lab doctor
The doctor command validates everything that typically trips up beginners: Git, Docker, Compose, ssh-keygen, and ensuring the necessary local ports (2222 to 2225 for SSH, 8080 for HTTP) are free.
Next, build and start the lab:
./lab up
The initial run takes a few minutes as Docker downloads base images. During this process, the lab automatically generates an Ed25519 SSH key pair (stored in .lab/ssh), injects the public key into the managed hosts, and configures Ansible to use the private key. Your personal SSH keys are untouched.
Verify everything is running:
./lab status
You should see your four managed hosts online.
(Optional: Run ./lab studio to open a web-based VS Code editor at http://127.0.0.1:8443 with all tools pre-configured.)
Run Your First Ansible Command
It is time to test your setup with the Ansible ping module:
./lab ping
(On Windows without WSL, use .\lab.ps1 ping)
You should see output similar to this:
atlas | SUCCESS => {
    "changed": false,
    "ping": "pong"
}
beacon | SUCCESS => {
    "changed": false,
    "ping": "pong"
}
ledger | SUCCESS => {
    "changed": false,
    "ping": "pong"
}
vaultbox | SUCCESS => {
    "changed": false,
    "ping": "pong"
}
Seeing four pong responses is a massive milestone! It proves that:
- Ansible successfully read your inventory.
- It reached every managed node.
- It authenticated securely over SSH.
- It executed a Python module on each host.
- It returned structured JSON results.
Note: The Ansiblepingmodule is completely different from the standard ICMP networkpingcommand. It is a dedicated test module that proves Ansible can connect, authenticate, and execute code successfully.
What Just Happened? The Ansible Mental Model
The flow of that simple ping command represents the core workflow of Ansible:
- Inventory: Ansible reads the inventory file to discover available hosts.
- Connection: Ansible connects to the targeted hosts via SSH.
- Distribution: Ansible securely copies a small Python module to the remote host.
- Execution: The remote host executes that module.
- Collection: Ansible retrieves the results and displays them in your terminal.
Almost all advanced Ansible tasks are just variations of this loop. Instead of simply testing the connection, you will eventually instruct Ansible to install packages, manage users, render configuration files, and restart services.
Troubleshooting Common Setup Problems
Docker Is Not Running
Error: Cannot connect to the Docker daemon
Fix: Launch Docker Desktop (Windows/macOS) or start the Docker system service (Linux). Run docker version to ensure both client and server are active.
Docker Compose Is Missing
Error: docker: 'compose' is not a docker command
Fix: Install Docker Desktop, or manually install the docker-compose-plugin for Linux.
Ansible Is Missing
Error: ansible: command not found
Fix: On Linux/macOS, run pipx install --include-deps ansible. On Windows without WSL, ensure you are using the .\lab.ps1 wrapper script to utilise the built-in forge container.
SSH Connection Fails
Error: UNREACHABLE!
Fix: Verify the lab is running with ./lab status. If containers were interrupted or rebuilt, reset the lab entirely:
./lab reset
./lab up
./lab ping
How to Clean Up
When you are done with your practice session, simply spin down the containers:
./lab down
If you ever want to completely wipe the lab and start from scratch, run:
./lab reset
Do not hesitate to use the reset command! The entire purpose of this lab is to make experimenting and making mistakes completely painless.
What You Learnt
Congratulations! You now have a robust, multi-host Ansible practice environment running. You have also executed your first Ansible command and witnessed the core control-node to managed-node workflow in action.
In the next article, we will dive deeper into the Ansible inventory. We will inspect host groups, run powerful ad-hoc commands, gather system facts, and start using Ansible to solve real-world operational challenges.
Keep Reading
If you enjoyed building this local lab, you might also like my guides on running full cloud environments on your local machine:
- Run AWS on Your Laptop: A 9-Part LocalStack Build Series
- Deploying Azure locally with OpenTofu and floci-az
You can find more DevOps and automation articles on the homepage at alishaikh.me.
Official Documentation
If you want to dig deeper into the tools we used today, these official guides are the best places to start:
- Ansible: Installation Guide and Getting Started.
- Core Concepts: Learn more about the Inventory and Ad-Hoc Commands.
- Modules: The builtin ping module we just used.
- Docker: Ensure your Docker Desktop installation is fully up to date.