Festive STEM Adventure: Building the Acebott ESP32 QD001 Robot Car with My Daughter
Remember that traffic light controller I built for my daughter? Then the proximity sensor upgrade that turned it into a peek-a-boo game? Well, this Christmas, I thought: why not go bigger?
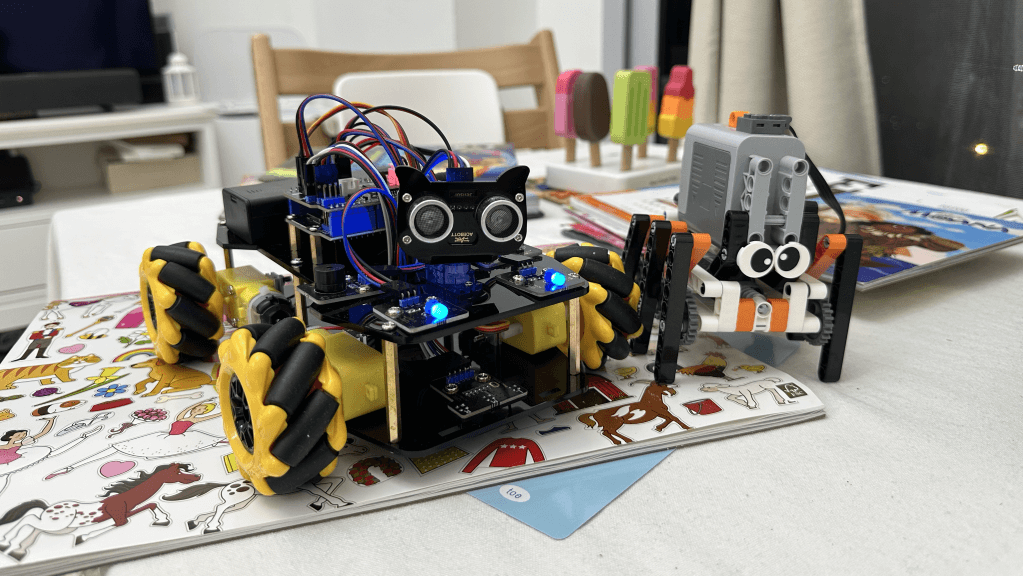
Enter the Acebott QD001 ESP32 4WD Robot Kit. Four wheels, motors, sensors, and an ESP32 brain. A proper robot car that she could actually drive around the living room. The kind of thing that would've cost hundreds a few years ago, now sitting at a fraction of that price.
I'll be honest—I was curious. Would a ready-made kit be as satisfying as building something from scratch? Would the quality hold up? And more importantly, could my 2-year-old actually get involved in putting this together?
Turns out, yes to all three.
What You Get in the Box
The Acebott QD001 arrives as a complete starter kit. No hunting for compatible parts across three different websites. No "oh, I forgot to order the motor driver" moments at 11 PM.
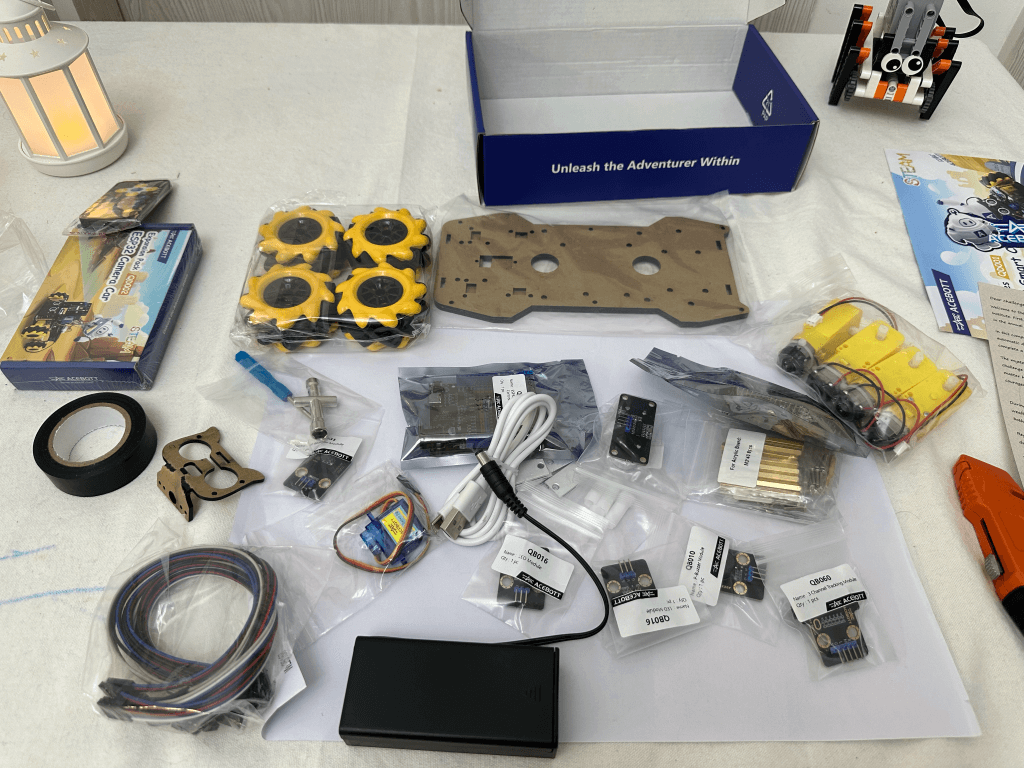
Here's what's included:
- Electronics: ESP32 MAX V1.0 development board and L298N motor driver shield
- Sensors: HC-SR04 ultrasonic sensor, line tracking sensors, and IR receiver
- Mechanical: 4WD chassis with motors and wheels, acrylic chassis plates
- Accessories: IR remote control, LED headlights, buzzer, battery holder (18650 batteries not included), screws, standoffs, and cables
The documentation is solid too. Clear assembly diagrams, wiring schematics, and example code for different functionalities. You can find it all on their documentation site. They also have YouTube videos for assembly.
Putting It Together
This is where it got fun. The assembly is genuinely straightforward—no ambiguous instructions or mystery screws left over at the end. The chassis uses an acrylic sandwich design: bottom plate, motors mounted with brackets, middle plate for the electronics, top plate for the sensors.
My daughter's contribution? She handed me screws (sometimes the right ones), held the screwdriver when I needed both hands, plugged in a few of the larger connectors, and helped push the wheels onto the motor shafts. That last bit required a bit of force, and she was genuinely proud when they clicked into place.
The motors mount with simple brackets. The motor driver board sits on standoffs in the middle. Wiring is colour-coded. Takes maybe 2-3 hours if you're going slow and letting a toddler "help."
The only slightly fiddly bit was routing all the wires neatly so they wouldn't get caught in the wheels. Small zip ties helped there.
The Upload Problem (and Solution)
Right, so the robot's built. Time to upload some code and make it move.
Except... it wouldn't upload. At all.
Arduino IDE kept throwing errors: "Failed to connect with the device" and "Wrong boot mode detected (0x13)." The ESP32 was booting normally instead of entering download mode to accept new firmware.
Here's the thing about the Acebott ESP32 MAX V1.0—it doesn't have a dedicated BOOT button like most development boards. When you want to upload code, you need to manually force it into download mode.
The fix: connect GPIO0 (labelled "00" on the board) to GND with a jumper wire, then press the RST button. This pulls GPIO0 low during reset, which is what triggers the bootloader.
I wrote up the full solution here if you run into the same problem. The short version:
- Use a jumper wire to connect GPIO0 to GND
- Press RST
- Start your upload
- Keep the jumper connected until upload completes
- Remove jumper, press RST again to boot normally
Annoying? Yes. But once you know the trick, it's fine. Takes ten extra seconds per upload.
Making It Work Better
The kit comes with separate example programs—one for IR remote control, another for app control via WiFi. Both worked fine, but I wanted both control methods available at the same time. Why choose?
Combining them was straightforward. The IR receiver and WiFi stack don't interfere with each other. I merged the two examples into a single program that listens for commands from either source. Whichever one sends a signal first wins. Simple.
One limitation with the app control is that you need to connect to the car's WiFi network to control it. It works, but it's not ideal—you lose internet connectivity on your phone whilst connected. I'll explore creating a custom app in the future that might handle this better, perhaps using a different network architecture.
The other change I made was moving some of the larger constant arrays into PROGMEM. The example code had a bunch of lookup tables and configuration data sitting in RAM. On an ESP32, you've got plenty of flash storage—why waste precious RAM?
Not a massive difference for a project this size, but it's good practice. Keeps RAM free for runtime variables and buffers.
Troubleshooting the IR Remote
Getting the IR remote working turned into an interesting learning exercise. The remote uses infrared signals to communicate with the receiver on the robot—essentially flashing an IR LED in specific patterns that encode commands.
The protocol is fairly simple once you understand it. When you press a button, the remote sends a burst of IR pulses at 38kHz (the carrier frequency). The pulses are modulated to encode data: different combinations of short and long pulses represent different commands. The IR receiver on the robot demodulates this signal and outputs the raw timing data.
The Arduino IR libraries (like IRremote) handle the decoding. They measure the pulse widths and decode them into command codes. Each button on the remote has a unique code—forward might be 0xFF18E7, backward 0xFF4AB5, and so on.
My first issue was that pin 4 on the shield wasn't responding at all. No matter what I tried, the IR receiver wouldn't pick up signals. After checking the wiring multiple times, I moved the IR receiver connection to GPIO 27 instead. Worked immediately. Sometimes it's just a dodgy connection point on the board.
The other thing I wanted was to control the robot's lights with the remote—not just movement. To do this, I needed to know the exact codes each button sends. I flashed a simple debug sketch first that just printed out the raw IR codes to the Serial Monitor. Pressed each button on the remote, noted down the hex codes, then added those to the main program. The * button now toggles the headlights on and off. I captured the other button codes as well and stored them in the code for future upgrades—having those codes ready means I can easily map new functions later without running the debug sketch again.
It's a nice reminder that even with kits, you often need to go off-script to get exactly what you want.
The complete code will be available on my GitHub if you want to see the changes. Nothing ground-breaking—just sensible tweaks that made the robot more flexible.
Why Kits Like This Matter
There's something to be said for building everything from scratch. I still enjoy that. Picking components, writing custom code, troubleshooting weird hardware interactions.
But kits like the Acebott QD001 serve a different purpose. They lower the barrier to entry. Someone who's never touched robotics can open this box, follow the instructions, and have a working robot in an afternoon. That's powerful.
The cost is reasonable too. Around £50-60 depending where you buy it. That includes everything except batteries. Compare that to buying motors, chassis, driver boards, sensors, and a microcontroller separately—you'd spend more and have to figure out compatibility yourself.
And for kids? There's real value in seeing a pile of parts transform into something that moves and responds. My daughter doesn't understand motor drivers or PWM signals. But she absolutely understands that when she presses the button on the remote, the robot goes forward. Cause and effect. That's where learning starts.
These kits also teach you the fundamentals without getting lost in the weeds. You learn how motor control works, how sensors provide feedback, how wireless communication lets you control things remotely. The principles transfer to other projects.
Could I have built something similar from scratch? Sure. Would it have been as polished? Probably not. Would my daughter have cared? Definitely not.
Watching Her Play
The first time she made the robot move, her face lit up. Same expression as when she discovered the traffic light responded to the proximity sensor.
She's still working out the controls—forward is intuitive, turning less so. But she's figuring it out. Sometimes the robot crashes into furniture. Sometimes she just drives it in circles. Doesn't matter.

What matters is that she's experimenting. Testing what happens when she presses different buttons. Learning that her actions have predictable results. That's the foundation of computational thinking, even if she won't call it that for another decade.
And when she gets bored of just driving it around? The kit has line-following sensors and obstacle avoidance capabilities built in. Though I'll admit, the obstacle avoidance mode isn't particularly accurate—it's a bit hit and miss. That's something I'll explore improving, along with finding better control methods that don't require connecting to the car's WiFi. There's room to grow.
What's Next: Expansion Packs
One thing I appreciate about the Acebott ecosystem is the availability of expansion packs. The QD001 is designed to be modular—you're not stuck with what comes in the box.
Acebott sells several add-ons: robot arm packs, tank treads, shooting mechanisms, even solar panels and GPS modules. I've already picked up the QD002 Camera Expansion Pack for the next upgrade.
The QD002 adds an ESP32-CAM module to the robot, giving it vision capabilities. Real-time video streaming to your phone, image recognition, wireless image transmission—all the things that turn a simple remote-control car into something that can "see" its environment. It's designed for beginners to learn about camera integration and wireless streaming without getting overwhelmed by the hardware side.
I'll probably tackle that upgrade in a future article. Adding a camera opens up possibilities for autonomous navigation, line-following with visual feedback, or even facial recognition experiments. The robot's already got the processing power with the ESP32—might as well put it to use.
Final Thoughts
The Acebott QD001 isn't trying to be everything to everyone. It's a starter kit. It gives you a solid foundation and lets you build from there.
The quality is good. The motors have decent torque. The chassis is sturdy enough to survive a two-year-old's driving. The documentation is clear. And when you inevitably want to modify it—add more sensors, change the behaviour, integrate it with other systems—it's all ESP32-based. You're not locked into proprietary hardware.
Is it perfect? No. The lack of a BOOT button is annoying. The battery holder could be more secure. But these are minor gripes.
For anyone wanting to learn robotics, or teach it to someone else, or just have a fun weekend project, this kit delivers. It's accessible, educational, and actually works.
Plus, my living room now has a small yellow robot roaming around. That's worth something.
References & Resources
Product & Documentation:
- Acebott QD001 Official Documentation
- QD001 Product Page
- QD002 Camera Expansion Pack
- Acebott Expansion Packs Guide
Troubleshooting & Guides:
Related Projects:
- Building a Traffic Light Controller for My 2-Year-Old
- Peek-a-Boo with ESP32: Proximity Sensor Upgrade
More parent-engineer adventures to come.


Member discussion